Laser Scanning Confocal M-scope (Olympus LEXT): Difference between revisions
No edit summary |
|||
| (3 intermediate revisions by 2 users not shown) | |||
| Line 1: | Line 1: | ||
{{ |
{{tool2|{{PAGENAME}} |
||
|picture=OlympusLEXT.jpg |
|picture=OlympusLEXT.jpg |
||
|type = Inspection, Test and Characterization |
|type = Inspection, Test and Characterization |
||
|super= Aidan |
|super= Aidan Hopkins |
||
|super2= Tony Bosch |
|||
|phone= (805)839-2343 |
|||
|location=Bay 4 |
|location=Bay 4 |
||
|email=hopkins@ece.ucsb.edu |
|||
|description = Scanning Laser Confocal Microscope |
|description = Scanning Laser Confocal Microscope |
||
|manufacturer = [http://www.olympus-ims.com/en/metrology/ols4000/ Olympus] |
|manufacturer = [http://www.olympus-ims.com/en/metrology/ols4000/ Olympus] |
||
| Line 32: | Line 31: | ||
===Offline software=== |
===Offline software=== |
||
[https:// |
[https://wiki.nanofab.ucsb.edu/w/images/0/01/LEXT_OLS4100_InstallManual_Ver.3.1.8_offline.pdf LEXT OLS4000 Offline Software] |
||
== |
==Other Info== |
||
'''''Equip > Characterization > [[Microscopes]]''''' - ''see a list of all our microscopes'' |
'''''Equip > Characterization > [[Microscopes]]''''' - ''see a list of all our microscopes'' |
||
Latest revision as of 16:02, 30 July 2024
| ||||||||||||||||||||||||||||||
About
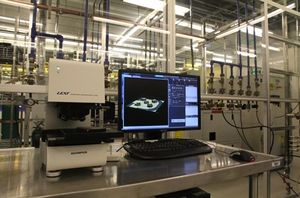
The LEXT OLS4000 3D Laser Measuring Microscope is designed for nanometer level imaging, 3D measurement and roughness measurement. Magnification ranges from 108x - 17,280x satisfy the needs of today's researchers. For a complete description of the tool and its capabilities, please see the above link to the manufacturer’s website.
Technique & Capabilities

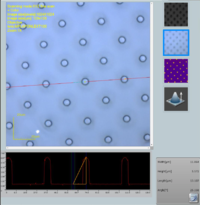
The LEXT allows you to take height measurements of features too small to reach with a physical Stylus needle, in a non-contact mode that is much faster than engaging an AFM tip. In addition, very large aspect-ratios can be measured - for example, 1mm depth x 50µm width. Confocal microscopy ensures that only surfaces that are in-focus will return a signal to the microscope detector. The LEXT sweeps the focus motor and captures a 2D scan of your sample at each focus step, taken with a blue laser (405 nm). After the scan, the height of each surface is calculated by the focus step which produced the highest laser intensity, and this is constructed into a 3D image by the OLS software.
Because this is an optical method, films that are optically transparent to blue light and/or have transparent sloping sidewalls can produce non-physical measurements due to optical interference on the sample. In addition, features on the order of the laser wavelength can produce unreliable/non-physical data - for example, the data near (within ~500 nm) very steep slopes, or features ≤ 1.0 µm wide may not be reliable.
Surfaces that are opaque to the laser wavelength work best, although measurements on rectangular transparent edges do work relatively well. Edges of steps where light does not reflect in an ideal manner often produce non-physical features, typically manifesting as trenches/spikes right next to the sidewall.
Technically the height-resolution is specified as 10 nm (the height resolution of the focus motor), but in practice, noise and optical uncertainties worsen this spec.
Operating Procedures
- Online Training Video:
- LEXT Laser Confocal M-Scope Training
- Important: This video is for reference only, and does not give you authorization to use the tool. You must be officially authorized by the supervisor before using this machine.
Offline software
Other Info
Equip > Characterization > Microscopes - see a list of all our microscopes
