Dicing Saw (ADT): Difference between revisions
| Line 17: | Line 17: | ||
== Operating Procedures == |
== Operating Procedures == |
||
Right click on the blade icon in the lower left corner of the screen and select 'Blade Change'. |
|||
Open the dicing saw cover and place the interlock defeating key in the door interlock. |
|||
Grab your blade/flange (with the grabbing tool or hand) and CAREFULLY place it onto the spindle. This should require very little force. If the flange doesn't easily slide onto the spindle please contact me immediately. |
|||
Once you have installed your blade and flange onto the spindle you must secure it with the lock nut. To do this, line up any of the two holes on the lock nut with the two pins on the two piece torque wrench tool. Hold the back part of the wrench in place with one hand and turn the front part of the wrench clockwise with the other hand. Once the lock nut is hand tight you'll have to crank on the torque wrench until you hear a click. That should be the appropriate amount of torque to keep the flange on the spindle. |
|||
== Recipes == |
== Recipes == |
||
Revision as of 16:40, 26 October 2018
|
About
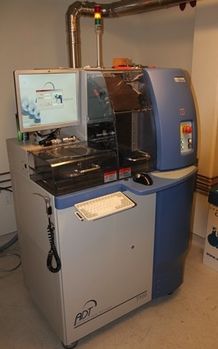
The ADT 7100 Dicing Saw is optimized for multi-angle dicing of thin, tight tolerance products up to 200 mm x 200 mm. It is currently setup for dicing up to 8” diameter wafers. Check the Dicing Saw Recipes page for the blades we currently stock.
Detailed Specifications
Operating Procedures
Right click on the blade icon in the lower left corner of the screen and select 'Blade Change'.
Open the dicing saw cover and place the interlock defeating key in the door interlock.
Grab your blade/flange (with the grabbing tool or hand) and CAREFULLY place it onto the spindle. This should require very little force. If the flange doesn't easily slide onto the spindle please contact me immediately.
Once you have installed your blade and flange onto the spindle you must secure it with the lock nut. To do this, line up any of the two holes on the lock nut with the two pins on the two piece torque wrench tool. Hold the back part of the wrench in place with one hand and turn the front part of the wrench clockwise with the other hand. Once the lock nut is hand tight you'll have to crank on the torque wrench until you hear a click. That should be the appropriate amount of torque to keep the flange on the spindle.
Recipes
- Packaging Recipes > Dicing Saw Recipes (ADT 7100)
Be sure to also see the methods for protecting your sample from dicing dust, and mounting/unmounting.
