Autostep 200 Troubleshooting and Recovery
If there is an issue with the tool that requires troubleshooting and recovery, please follow instructions bellow carefully.
Troubleshooting
Most of the errors are listed on the paper that is attached to the tall cabinet. Here are the most common ones:
What to do in case of computer (monitor) freeze-up. Please try these things in this order.
- Try CTRL C followed by A and Enter. This will abort any command that may have hung up.
- For Reticle Robot Hang Up: See step 25 of start-up procedure ( tall cabinet, printed paper on the wall).
What to do in case of unplanned power outage.
- CR Staff will take care of the system in the morning.
What to do for alignment error.
- Verify that correct alignment key offset is being used
- If you have DFAS alignment marks, perform a MAP job to verify alignment.
What to do for focus resolution problems.
- Perform a focus (EXPO) job using the same type of wafer that you will use for your real job and use the optimal focus offset determined from this job. You may need to look at both exposure time and focus.
- If you have been running the same process and now have issues, run SETUP from the : prompt, following the instructions on the GCA Regular Maintenance Sheet.
What to do in case of the stage limit going too far (red stage limit light will be lit inside the stepper chamber next to the joystick.
- Press the lit limit switch (lower left corner in the environmental chamber) to release the stage.
What to do if you cannot undo the problem or something is wrong with the tool:
- send e-mail to nanofab@ucsb.edu and report the problem
- contact 1) Mike Silva : x 3918 x 219 Work, 2) Biljana Stamenic:x4002 Work, or Lee Sawyer: Work)
- contact 2) 3Ctechnical (Ask for Matt, Adam or Mike). The contact info bellow:
(matt@3ctechnical.com, www.3ctechnical.com, phone: 480-963-4559, fax: 480.212.0932)
System restarting procedure
If there is an error that requires powering down/ powering up components, please follow step by step instructions bellow.
How to power down components
1) Press “ctrl C & A” on the upper keyboard to abort any currently running process.
2) If the system is frozen skip to step 3
If not, press “ctrl & ] (right bracket) “ on the upper keyboard. (The main keyboard under the alignment screens)
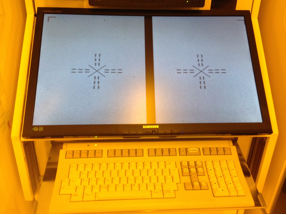
3) Open the lower cabinet and pull out the lower keyboard, quickly press “scroll lock” twice followed immediately by the “up arrow key”.
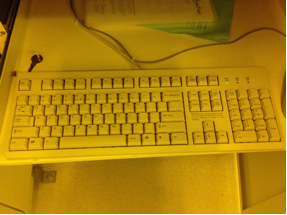
4) On the same lower keyboard, press “alt & x”.
5) Press “enter”.
6) In the lower cabinet, turn off the computer (#2)-(smart set) below the keyboard. Press the power button.
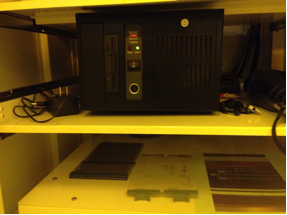
7) Retrieve the keys on the key chain (located in the lower cabinet in front of the computer).
8) Open the tall cabinet to the left.
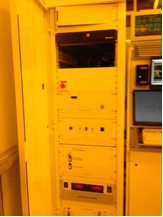
9) Use the keys to open the locked main computer (#1) - (kontron). It is the black flip down module. Turn off this computer.
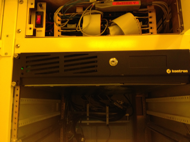
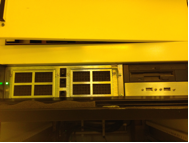
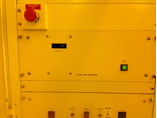
10) Go down the rack and turn off each control module. Do NOT turn off the lamp power supply OR the AC interface/ Power interface.
11) DSW/IAS - II control module: Should already be OFF.
12) DSW/AWH Control module: Switch it OFF. (power switch is on the right)
13) Stage Control module: Switch it OFF. (power switch is on the right)
14) RMS Control module: Switch it OFF. (power switch is on the left)
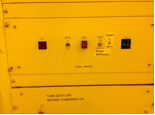
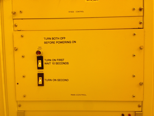
15) DO NOT TURN OFF THE LAMP
How to power up components
Power up the control modules, turning it ON following this order:
- RMS Control module: Switch it ON.
- Stage Control module: Switch it ON.
- DSW/AWH Control module: Switch it ON.
- DSW/IAS - II control module: Leave it OFF.
- Switch on the main computer (#1) - (kontron) and lock the cover.
- Open the upper panel door, above the locked computer (#1). Press and hold the black reset button for 2 sec.
- Close the tall cabinet door.
- Put the keys back in front of the computer (#2) in the lower cabinet.
- Switch on the computer under the keyboard in the cabinet. Press the power button.
- On the lower keyboard press “enter” to default to the command prompt, or wait and it will default for you.
- Press “enter” twice to clear wait prompts.
- Press “F10”.
- Arrow to the right twice to the stepper menu.
- Arrow down one to highlight the “start” option. Press “enter” again.
- On the middle keyboard press “caps lock”.
- Wait for the system to prompt you to enter the date and time on the middle key board. HH:MM DD-MMM-YY as in 01:15 27-JUL-20. Press “enter”.
- Open the lower cabinet and pull out the lower keyboard, quickly press “scroll lock” twice followed immediately by the “up arrow key”. This will switch the upper monitor for setup execution.
- Log in to your account. Log In [10, xxx]
- Type “RESET” and “enter”. Look at the mask loading robot and make sure it is facing the reticle mask box correctly. It may misalign toward you a little. This is bad. Go to error section (RMS error).
- If Mask is still on, type “RMSR” to remove mask.
- Run “INV” to inventory the masks in the elevator.
- “SETUP” align target and press “expose”.
- System is ready to run.